
Set up the Risk Based Approach
Define risk levels, then use the two scoring methods to decide how each client is rated. This is the core compliance control.
For compliance officersStep 1. Turn on RBA and set the bands
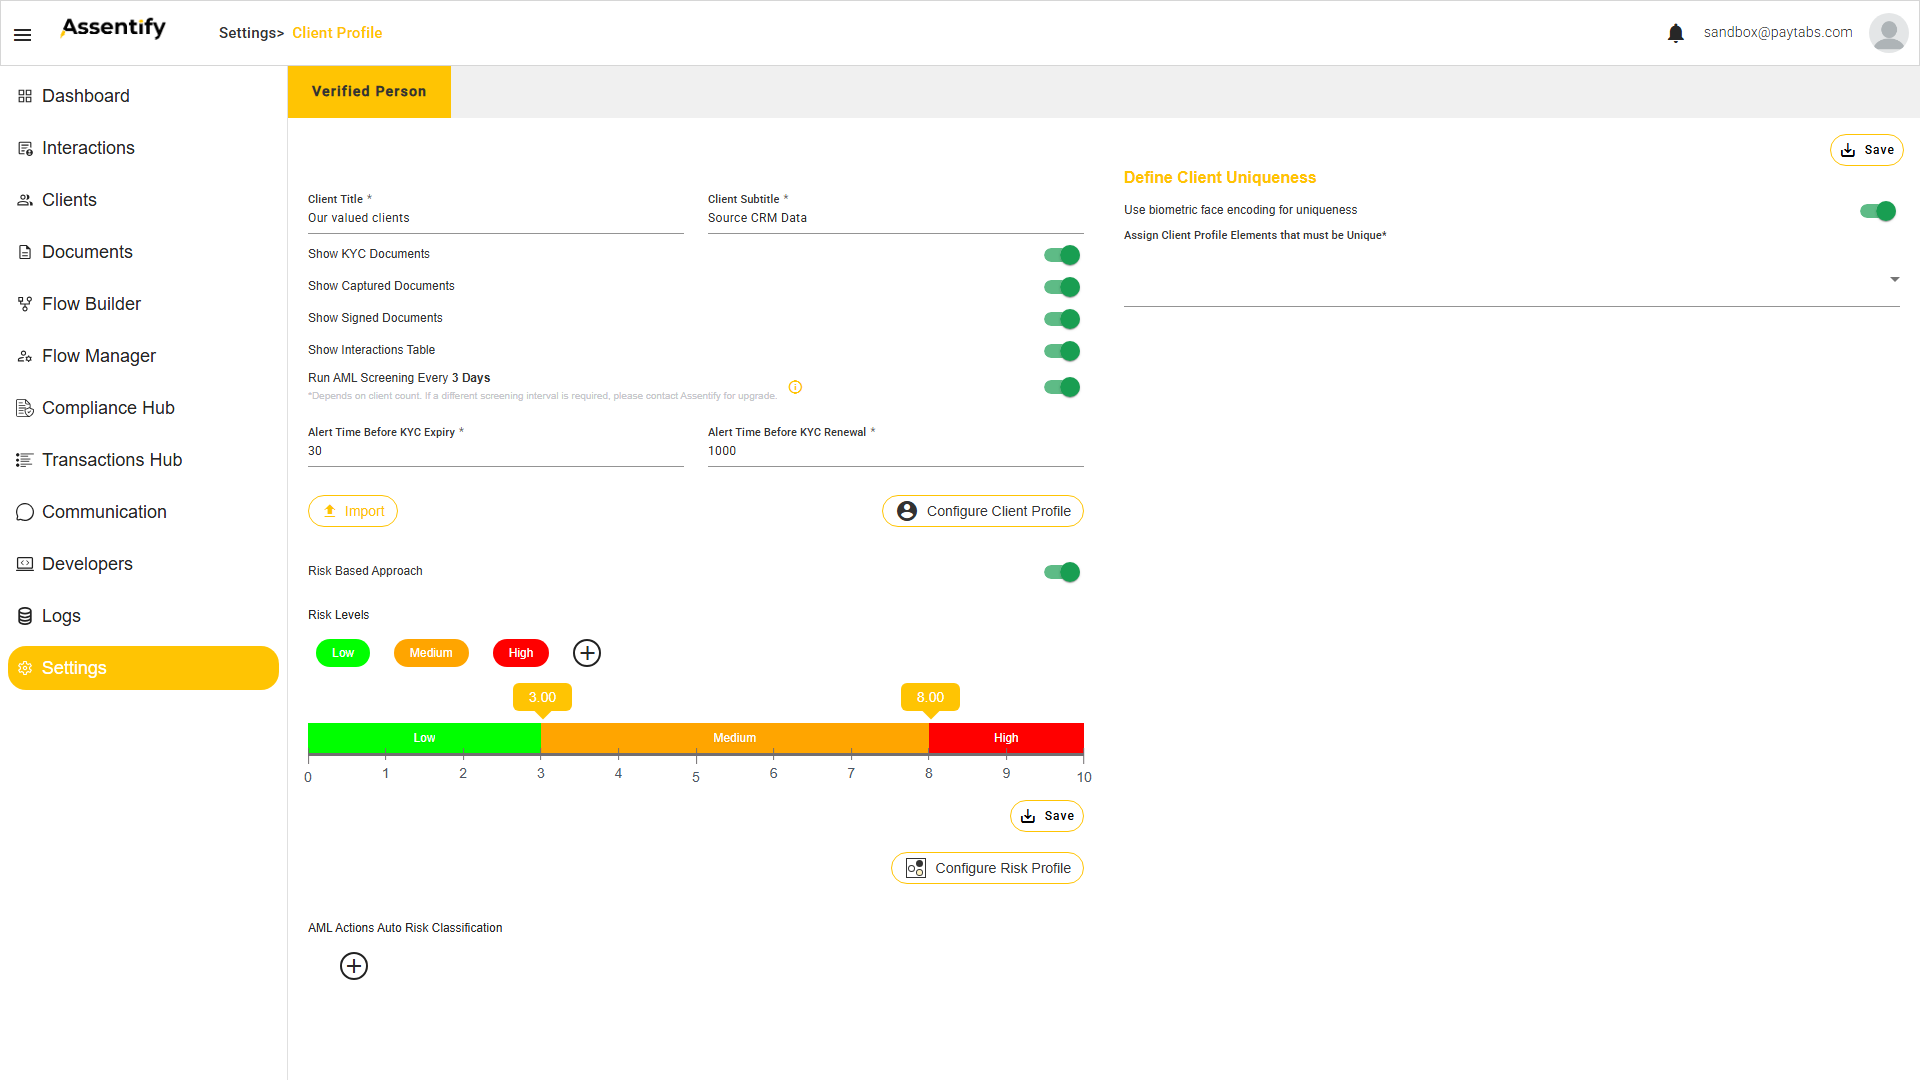
- Open Settings > Client Profile and turn on Risk Based Approach. This toggle exposes the whole risk model, so nothing below appears until it is on.
- Drag the thresholds on the 0 to 10 bar to set the Low, Medium, and High bands. Defaults are Low 0 to 3.00, Medium 3.00 to 8.00, High 8.00 to 10. The bands share exact edge values of 3.00 and 8.00, which decides where a borderline score lands.
- Press Save. Use the + to add more levels if you need them.
Step 2. Add a data point to score
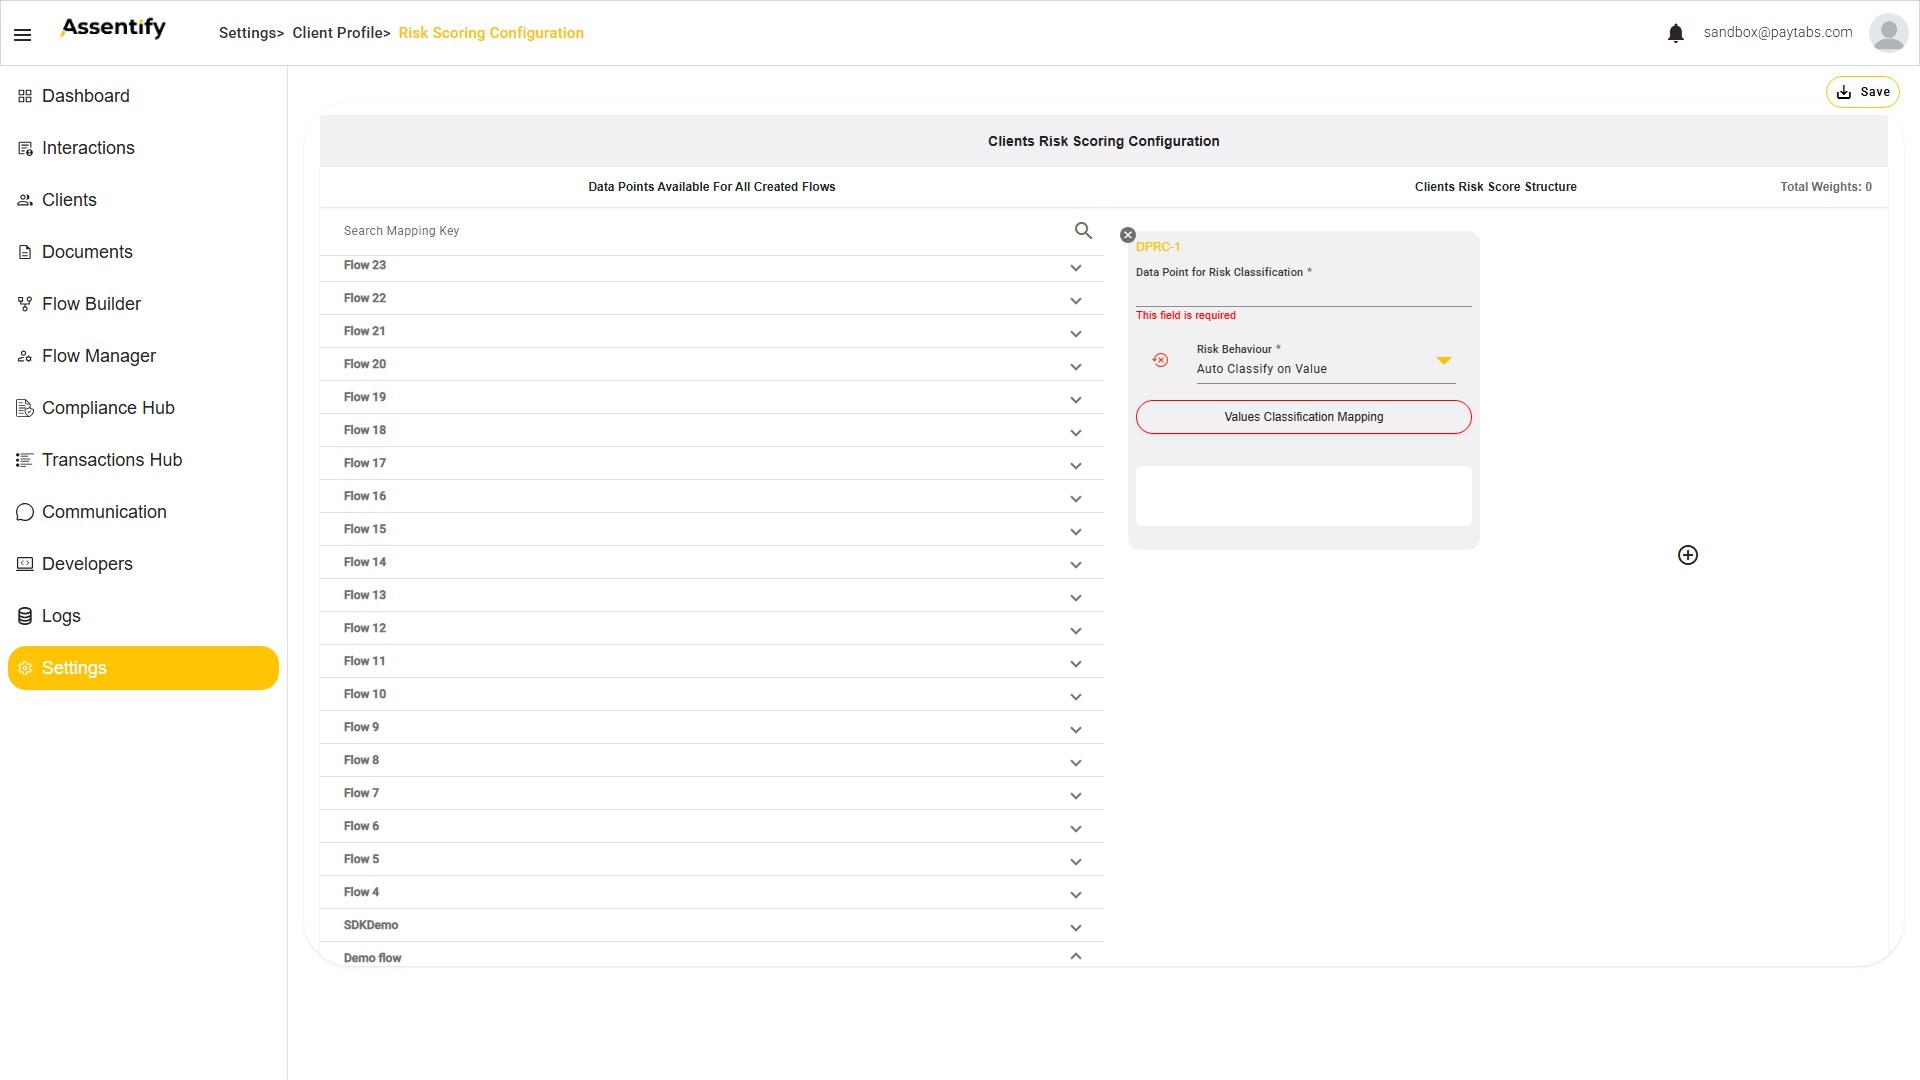
- Press Configure Risk Profile.
- Press + to add a Data Point for Risk Classification.
- Expand a flow on the left and choose the data point, for example Nationality.
The left panel is Data Points Available For All Created Flows. Every flow expands into its captured data points, grouped Engagement, Applications, and Clients. A Search Mapping Key box filters the list, and field type icons show the data type, such as text, date, or email. These are the client attributes you can score on. They come from your captured flow steps, so see Flow Builder for how they are collected.
The right panel is Clients Risk Score Structure. It lists the DPRC cards you have added and shows a running Total Weights. A + adds another DPRC.
Step 3. Choose one of the two methods
Contributes to Risk Score
The value adds a weight to the total score, which lands in a band. Use it for factors that should add up, like nationality plus occupation plus product.
Auto Classify on Value
The value sets the risk level directly and overrides the score. Use it for hard rules, like a sanctioned country always being High.
- Set Risk Behaviour to the method you want.
- Open Values Classification Mapping to open a per value editor. For each possible value of the data point you assign either a weight (for Contributes) or a target risk level (for Auto Classify). Use Add Custom to map a specific value, Add Decision, and the add row control to build the list.
- Repeat for every risk factor, watch the Total Weights, then Save.
Step 4. Tie AML outcomes to automatic actions
Below the risk model on the Client Profile page sits a separate AML Actions Auto Risk Classification area, with its own +. It defines automatic actions tied to AML outcomes. This is distinct from the per data point scoring above. The scoring above rates the client, while this area reacts to a screening result. For the AML screening context, see Compliance guide, Screening.
← Back to the Compliance guide
Related: Flow Builder for where scored data points are captured · Glossary for DPRC and Total Weights. The same data tree that feeds scoring also feeds Split logic and Client Profile mapping.